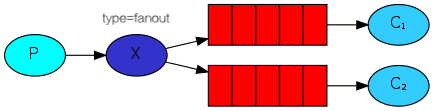
Spring Cloud Stream 預設是使用 RabbitMQ 的 Exchange: topic 模式,但是如果我們想把資料傳送 (廣播) 到每個訂閱該 Exchange 的 Consumer 上,也就是俗稱的 Publish/Subscribe 模式,那我們需要使用 RabbitMQ 的 Exchange: fanout 模式才能做到,本文將介紹如何實作一個簡單的 fanout 模式範例程式。
開始實作:
首先使用 Docker 在本地端運行一個 RabbitMQ 服務,在終端機輸入以下指令:
$ docker run -e RABBITMQ_DEFAULT_USER=admin -e RABBITMQ_DEFAULT_PASS=123456 -p 5672:5672 -p 15672:15672 --rm rabbitmq:3.8-management運行成功後,可以使用 http://localhost:15672/ 開啟 RabbitMQ 的 Web 管理介面,帳號為 admin,密碼為 123456。
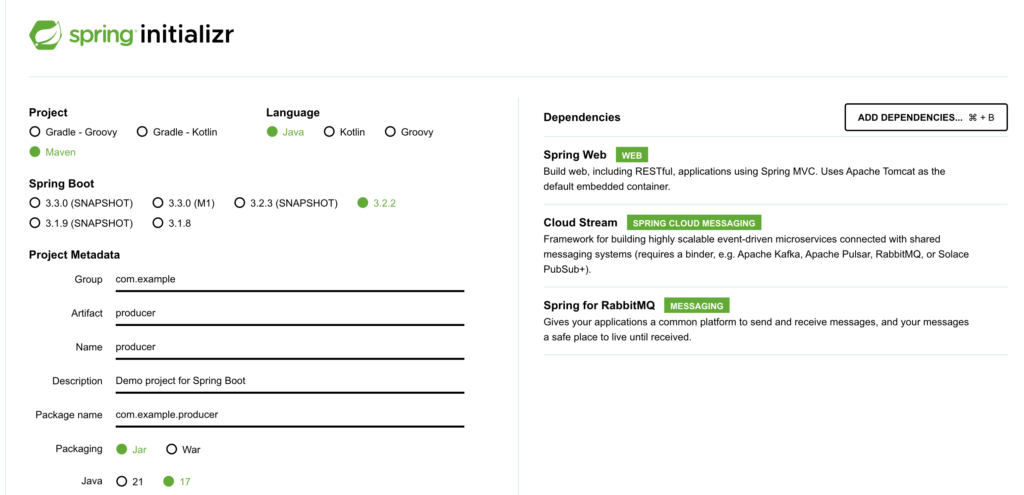
接著用 https://start.spring.io/ 建立一個新的 Spring Boot 專案,Artifact 為 producer;Dependencies 選擇 Spring Web、Cloud Stream、Spring for RabbitMQ。
然後用 IntelliJ IDEA 開啟 producer 專案的 pom.xml 檔案,載入專案,然後新增一個 Java Class,名稱為 ValueController,並加入以下程式碼:
package com.example.producer;

import org.springframework.beans.factory.annotation.Autowired;
import org.springframework.cloud.stream.function.StreamBridge;
import org.springframework.http.ResponseEntity;
import org.springframework.web.bind.annotation.GetMapping;
import org.springframework.web.bind.annotation.PathVariable;
import org.springframework.web.bind.annotation.RestController;

@RestController
public class ValueController {
    @Autowired
    private StreamBridge streamBridge;

    @GetMapping("values/{value}")
    public ResponseEntity<String> values(@PathVariable String value) {
        System.out.println("Sending value to topic: " + value);
        streamBridge.send("test-values-topic", value);
        return ResponseEntity.ok("ok");
    }
}
然後刪除 src/main/resources 下的 application.properties 檔案,在 src/main/resources 下新增一個 application.yml 檔案,並填入以下內容:
server:
  port: 8080
spring:
  cloud:
    stream:
      output-bindings: test-values-topic
      rabbit:
        bindings:
          test-values-topic:
            producer:
              exchangeType: fanout
  rabbitmq:
    host: localhost
    port: 5672
    username: admin
password: 123456說明:spring.cloud.stream.output-bindings 指定 streamBridge.send() 輸出綁定的名稱,spring.cloud.stream.rabbit.bindings.test-values-topic.producer.exchangeType 設定為 fanout,這樣可以創造一個名為 test-values-topic 的 exchange,且 type 為 fanout。
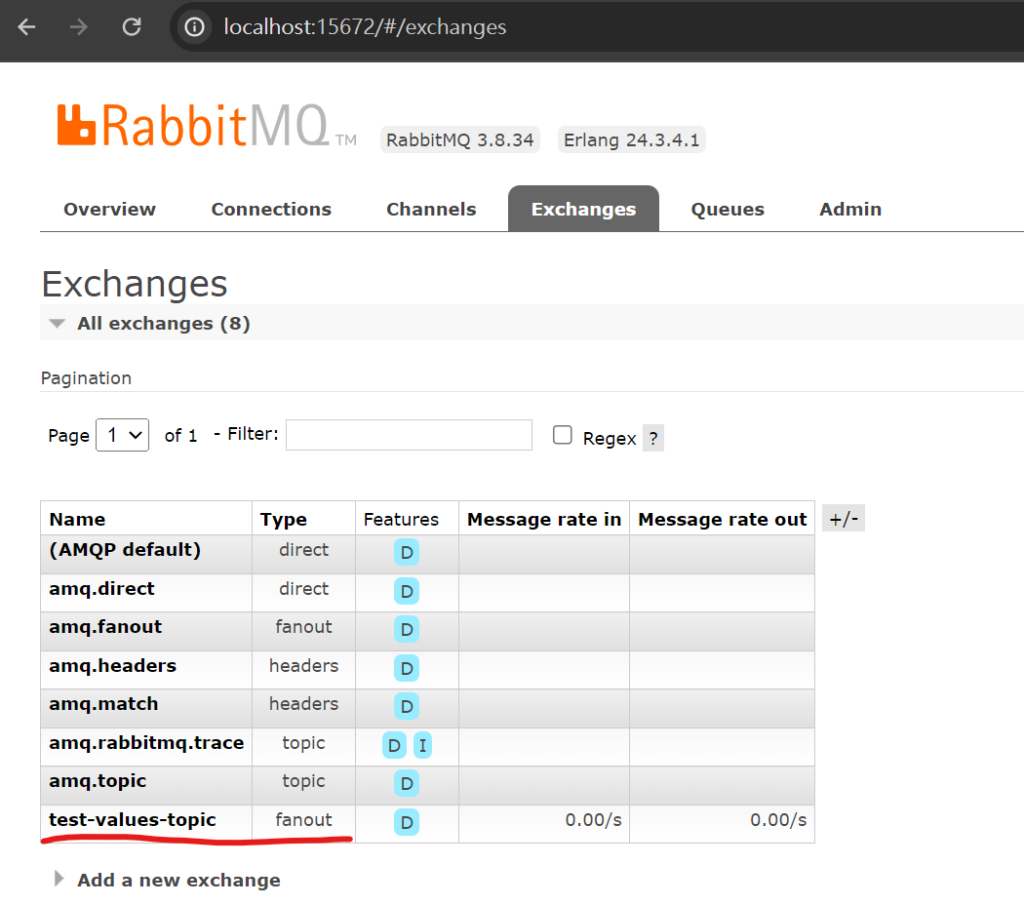
接著運行 producer 這個 Spring Boot 程式,可以從 RabbitMQ Web 管理介面裡看到多了一個 test-values-topic 的 exchange,且 type 為 fanout,如下圖所示:
接著用 https://start.spring.io/ 建立一個新的 Spring Boot 專案,Artifact 為 consumer1;Dependencies 選擇 Spring Web、Cloud Stream、Spring for RabbitMQ。
然後用 IntelliJ IDEA 開啟 consumer1 專案的 pom.xml 檔案,載入專案,然後新增一個 Java Class,名稱為 ValueConsumer,並加入以下程式碼:
package com.example.consumer1;

import org.springframework.context.annotation.Bean;
import org.springframework.stereotype.Component;

import java.util.function.Consumer;

@Component
public class ValueConsumer {
    @Bean
    public Consumer<String> onReceive() {
        return (value) -> {
            System.out.println("Received value in Consumer1: " + value);
        };
    }
}
然後刪除 src/main/resources 下的 application.properties 檔案,在 src/main/resources 下新增一個 application.yml 檔案,並填入以下內容:
server:
  port: 8081
spring:
  cloud:
    function:
      definition: onReceive
    stream:
      bindings:
        onReceive-in-0:
          destination: test-values-topic
          group: myConsumer1
      rabbit:
        bindings:
          onReceive-in-0:
            consumer:
              exchangeType: fanout
  rabbitmq:
    host: localhost
    port: 5672
    username: admin
    password: 123456
說明: spring.cloud.stream.bindings.onReceive-in-0.group 指定 queue 的後綴名稱,queue 的名稱會是 test-values-topic.myConsumer1。spring.cloud.stream.rabbit.bindings.onReceive-in-0.consumer.exchangeType 指定使用的 exchange type 為 fanout。
接著用 https://start.spring.io/ 建立一個新的 Spring Boot 專案,Artifact 為 consumer2;Dependencies 選擇 Spring Web、Cloud Stream、Spring for RabbitMQ。
然後用 IntelliJ IDEA 開啟 consumer2 專案的 pom.xml 檔案,載入專案,然後新增一個 Java Class,名稱為 ValueConsumer,並加入以下程式碼:
package com.example.consumer2;

import org.springframework.context.annotation.Bean;
import org.springframework.stereotype.Component;

import java.util.function.Consumer;

@Component
public class ValueConsumer {
    @Bean
    public Consumer<String> onReceive() {
        return (value) -> {
            System.out.println("Received value in Consumer2: " + value);
        };
    }
}
然後刪除 src/main/resources 下的 application.properties 檔案,在 src/main/resources 下新增一個 application.yml 檔案,並填入以下內容:
server:
  port: 8082
spring:
  cloud:
    function:
      definition: onReceive
    stream:
      bindings:
        onReceive-in-0:
          destination: test-values-topic
          group: myConsumer2
      rabbit:
        bindings:
          onReceive-in-0:
            consumer:
              exchangeType: fanout
  rabbitmq:
    host: localhost
    port: 5672
    username: admin
password: 123456說明:注意這裡的 spring.cloud.stream.bindings.onReceive-in-0.group 是 myConsumer2, consumer1 跟 consumer2 必須使用不同的 queue,才能同時都收到訊息。
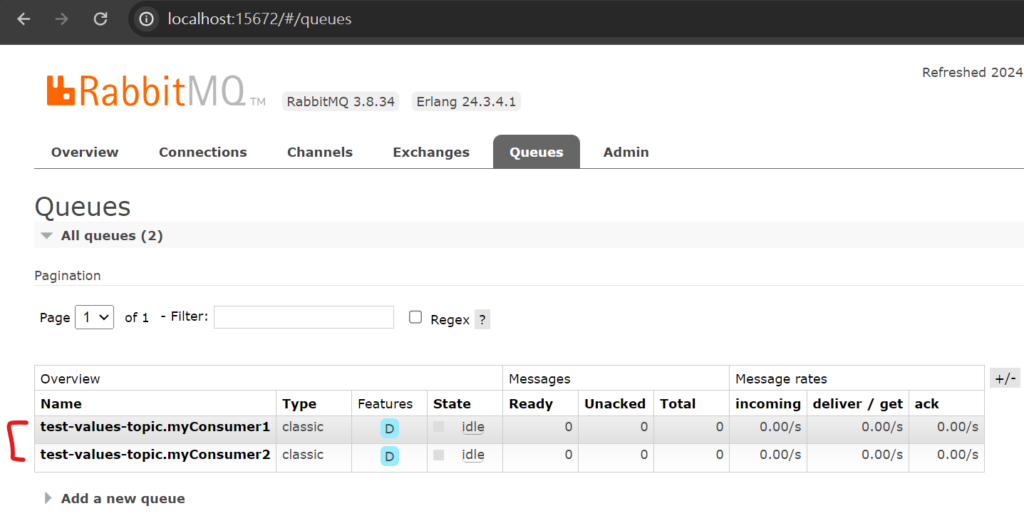
接著依序運行 consumer1、consumer2 這兩個 Spring Boot 程式,然後可以從 RabbitMQ Web 管理介面看到有 test-values-topic.myConsumer1 跟 test-values-topic.myConsumer2 這兩個 queue:
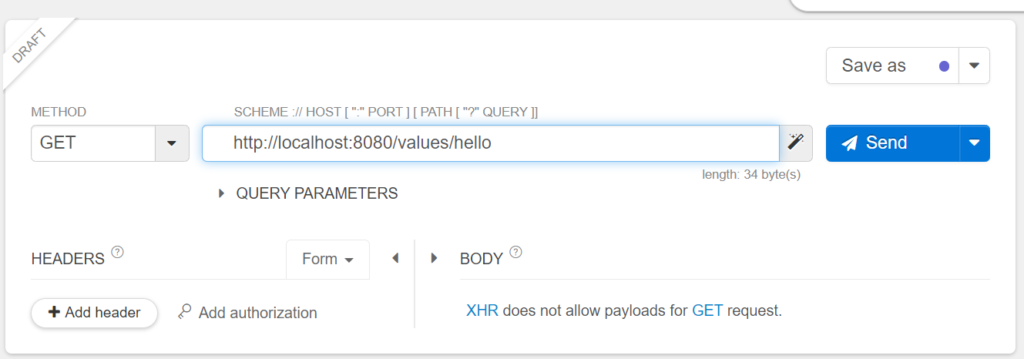
然後使用 postman 或是 API Tester 測試程式,傳送一個 hello 訊息:
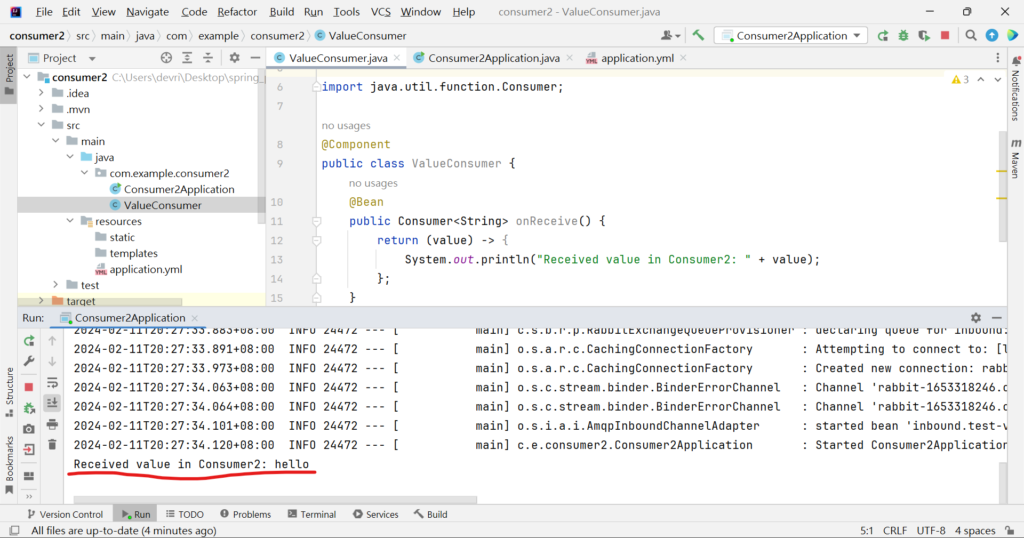
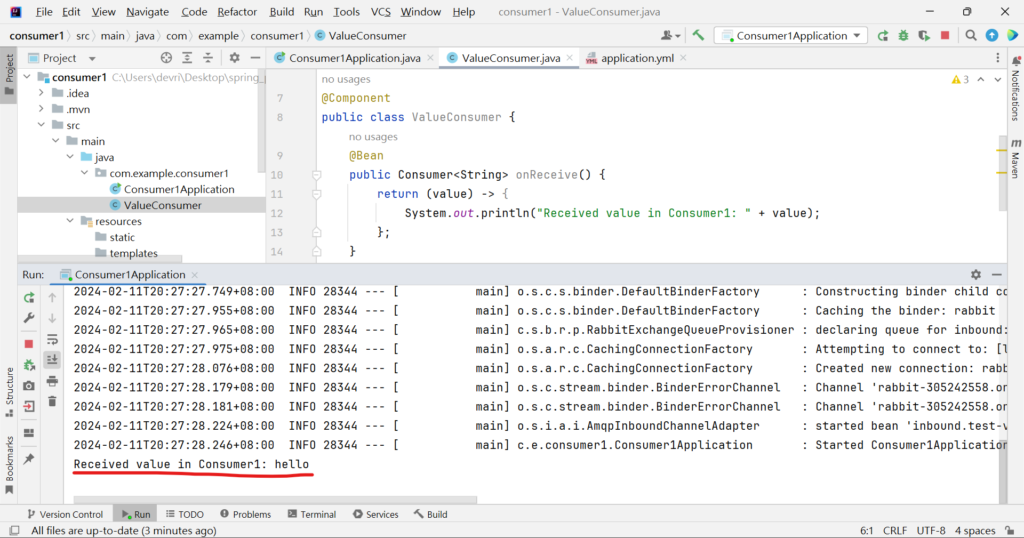
可以看到 consumer1 跟 consumer2 都有接收到 hello 訊息了!
consumer1 的輸出畫面:
consumer2 的輸出畫面: